
LaTeX Diff from Git Timeline VS Code Extension
I just published a new VS Code extension: LaTeX Diff from Git Timeline. It lets you visualize how your LaTeX documents evolve by building diffs straight from the git commit history.
What it does
- Shows a commit-by-commit view of your LaTeX files so you can track changes visually.
- Generates diffs using your repository history, making it easy to review edits before merging or sharing PDFs.
- Runs directly inside VS Code—no separate scripts or manual commands needed once configured.
Why I built it
Keeping track of LaTeX edits across branches can be tedious. This extension keeps everything inside VS Code, so you can stay focused on writing while still having a clear audit trail of how a document changes over time.
Try it out
Clone the repository and install the extension locally to give it a spin:
git clone https://github.com/MShirazAhmad/latex-diff-from-git-timeline.git
cd latex-diff-from-git-timeline
npm install
npm run compile
Then load the extension into VS Code from the generated package (Extensions → ... → Install from VSIX) and start diffing your LaTeX files against any commit in the timeline. Feedback and contributions are welcome!
How to use it
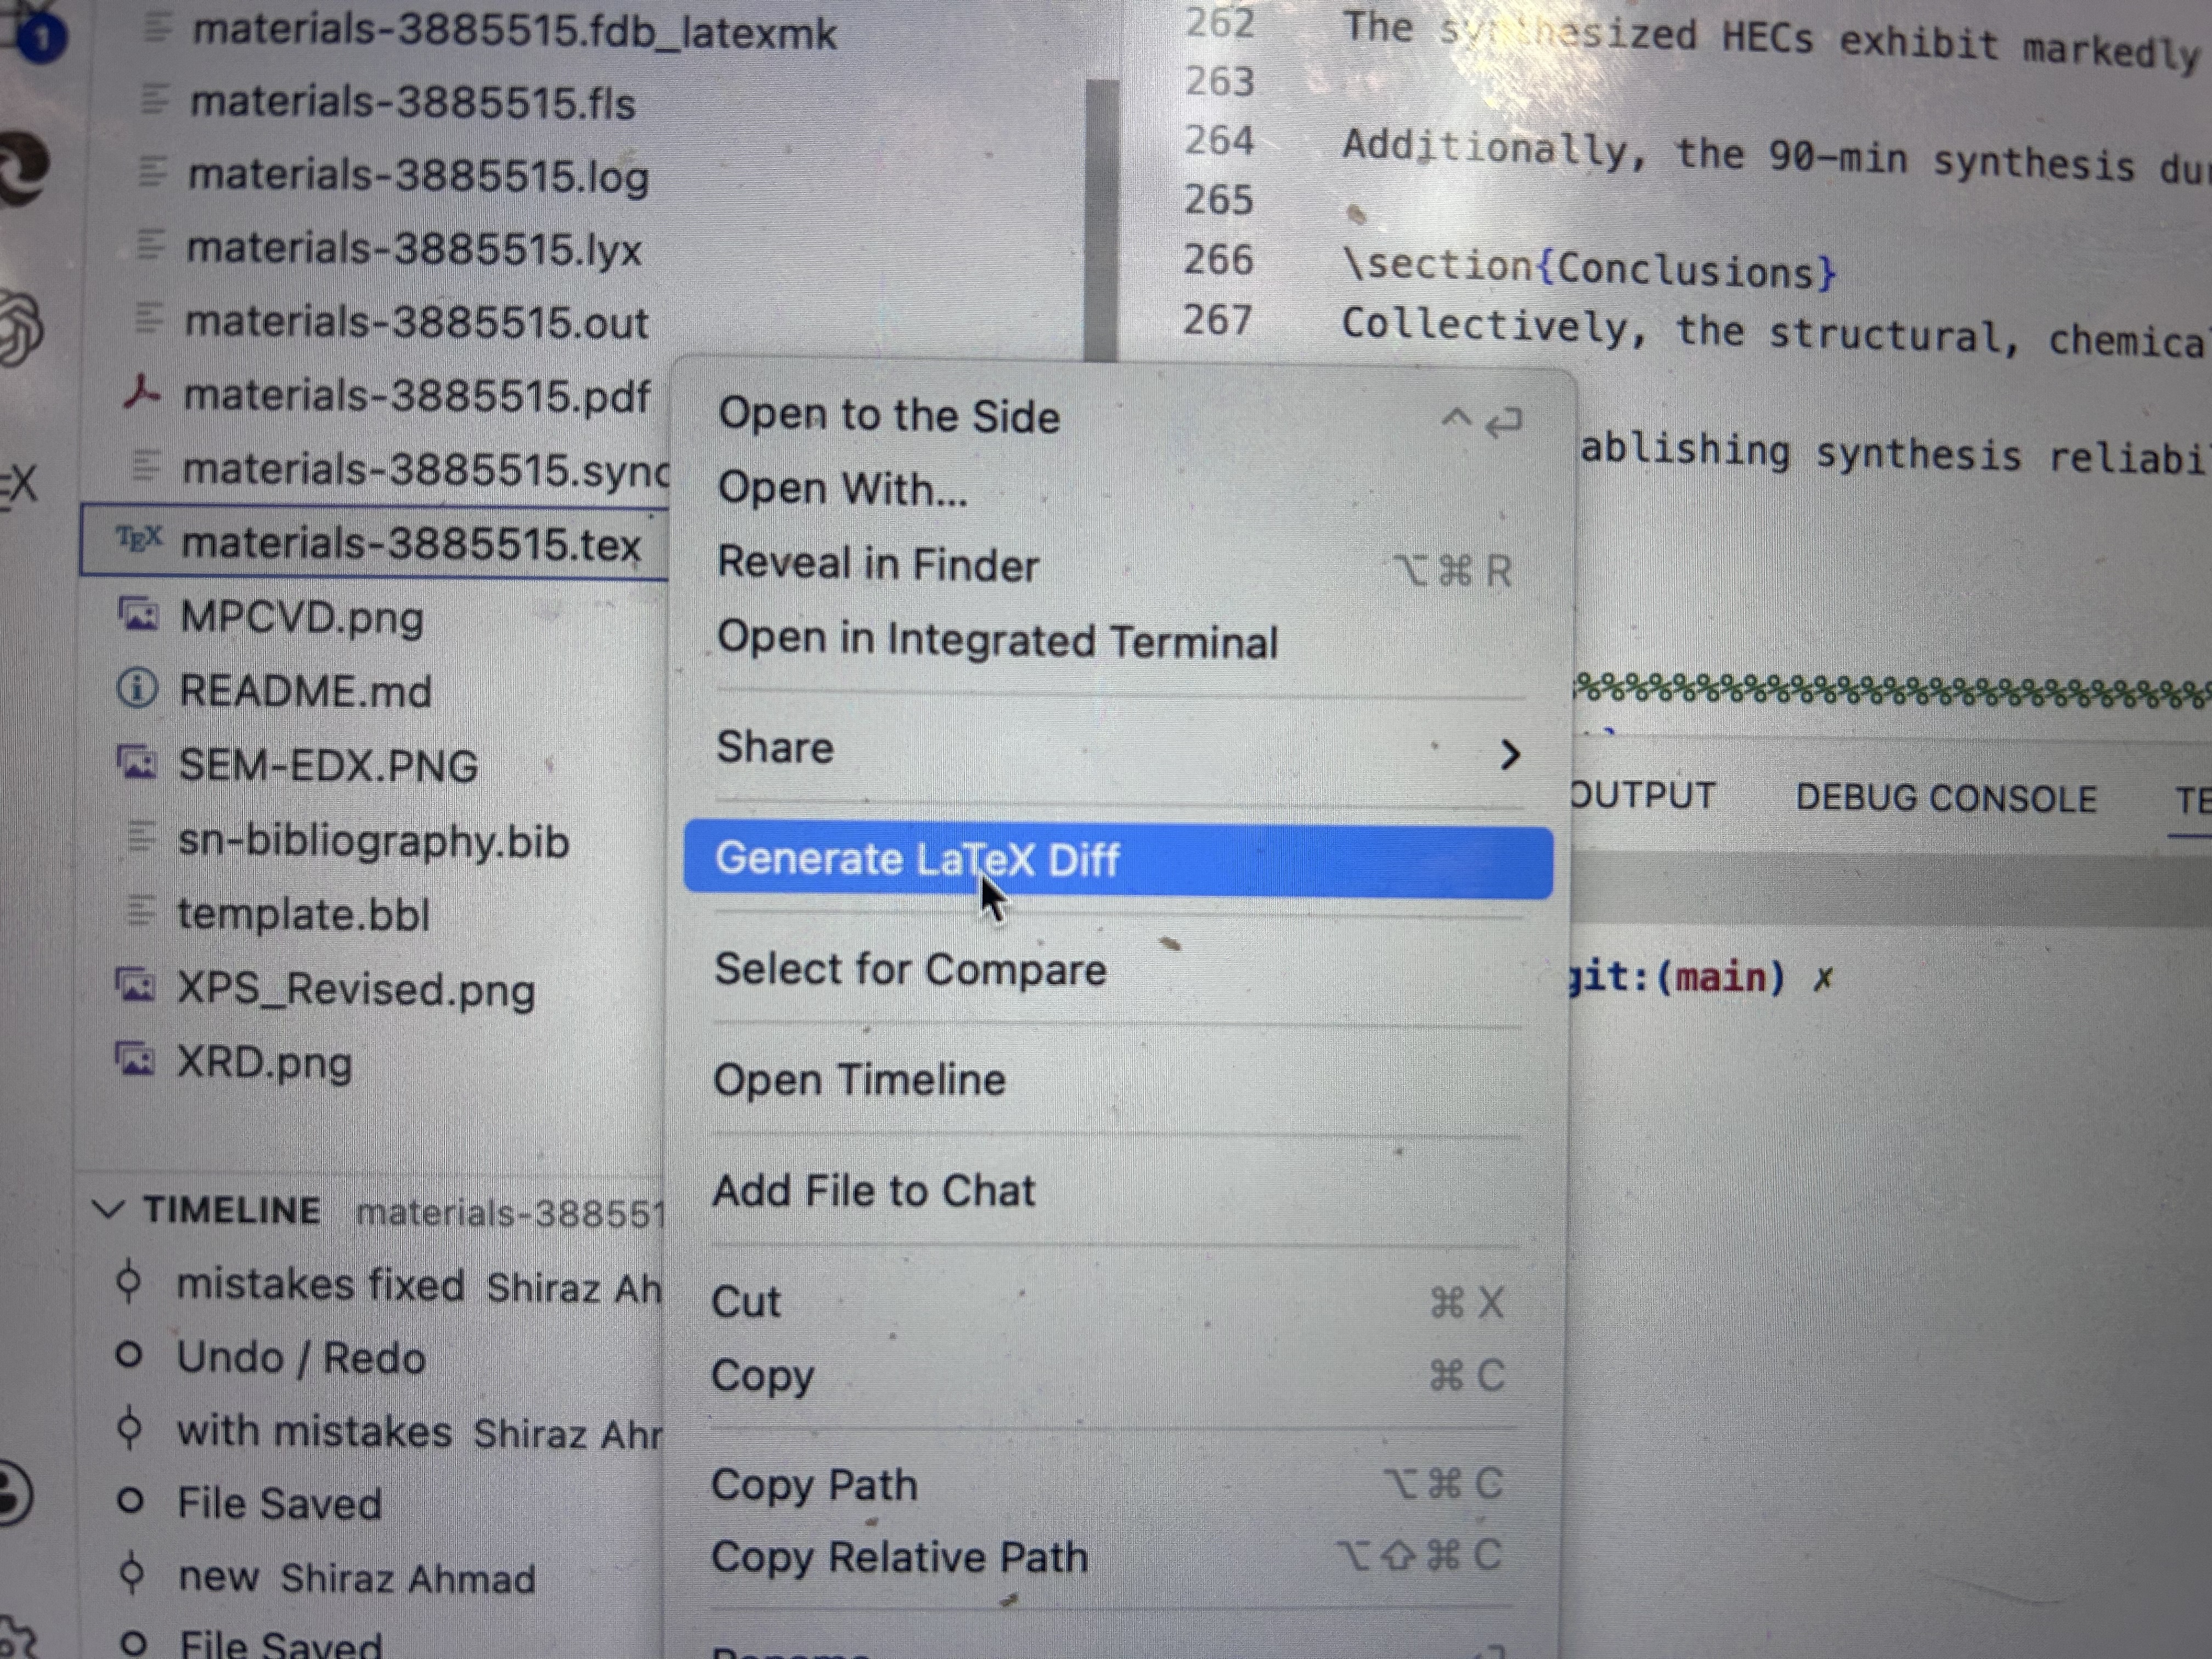
- Open your LaTeX project in VS Code, and right-click a
.texfile in Source Control (Changes/History) or Explorer. - Select Generate LaTeX Diff, choose the OLD version, then pick the NEW version (a commit or your working directory).
- The extension writes a
diff_<old>_to_<new>_<file>.texnext to your source file and offers to open it. - Compile that diff file (
pdflatex diff_...tex) to produce a PDF with tracked changes: additions in blue, deletions in red. - If you want the PDF to mirror your journal template, compile with the same main document preamble (e.g.,
pdflatex -jobname=tracked-change \input{diff_...tex}) so fonts and spacing match.
In-editor selection flow (screenshots)
 Right-click any
 .tex file in Explorer or Source Control to start the diff workflow without leaving VS Code.
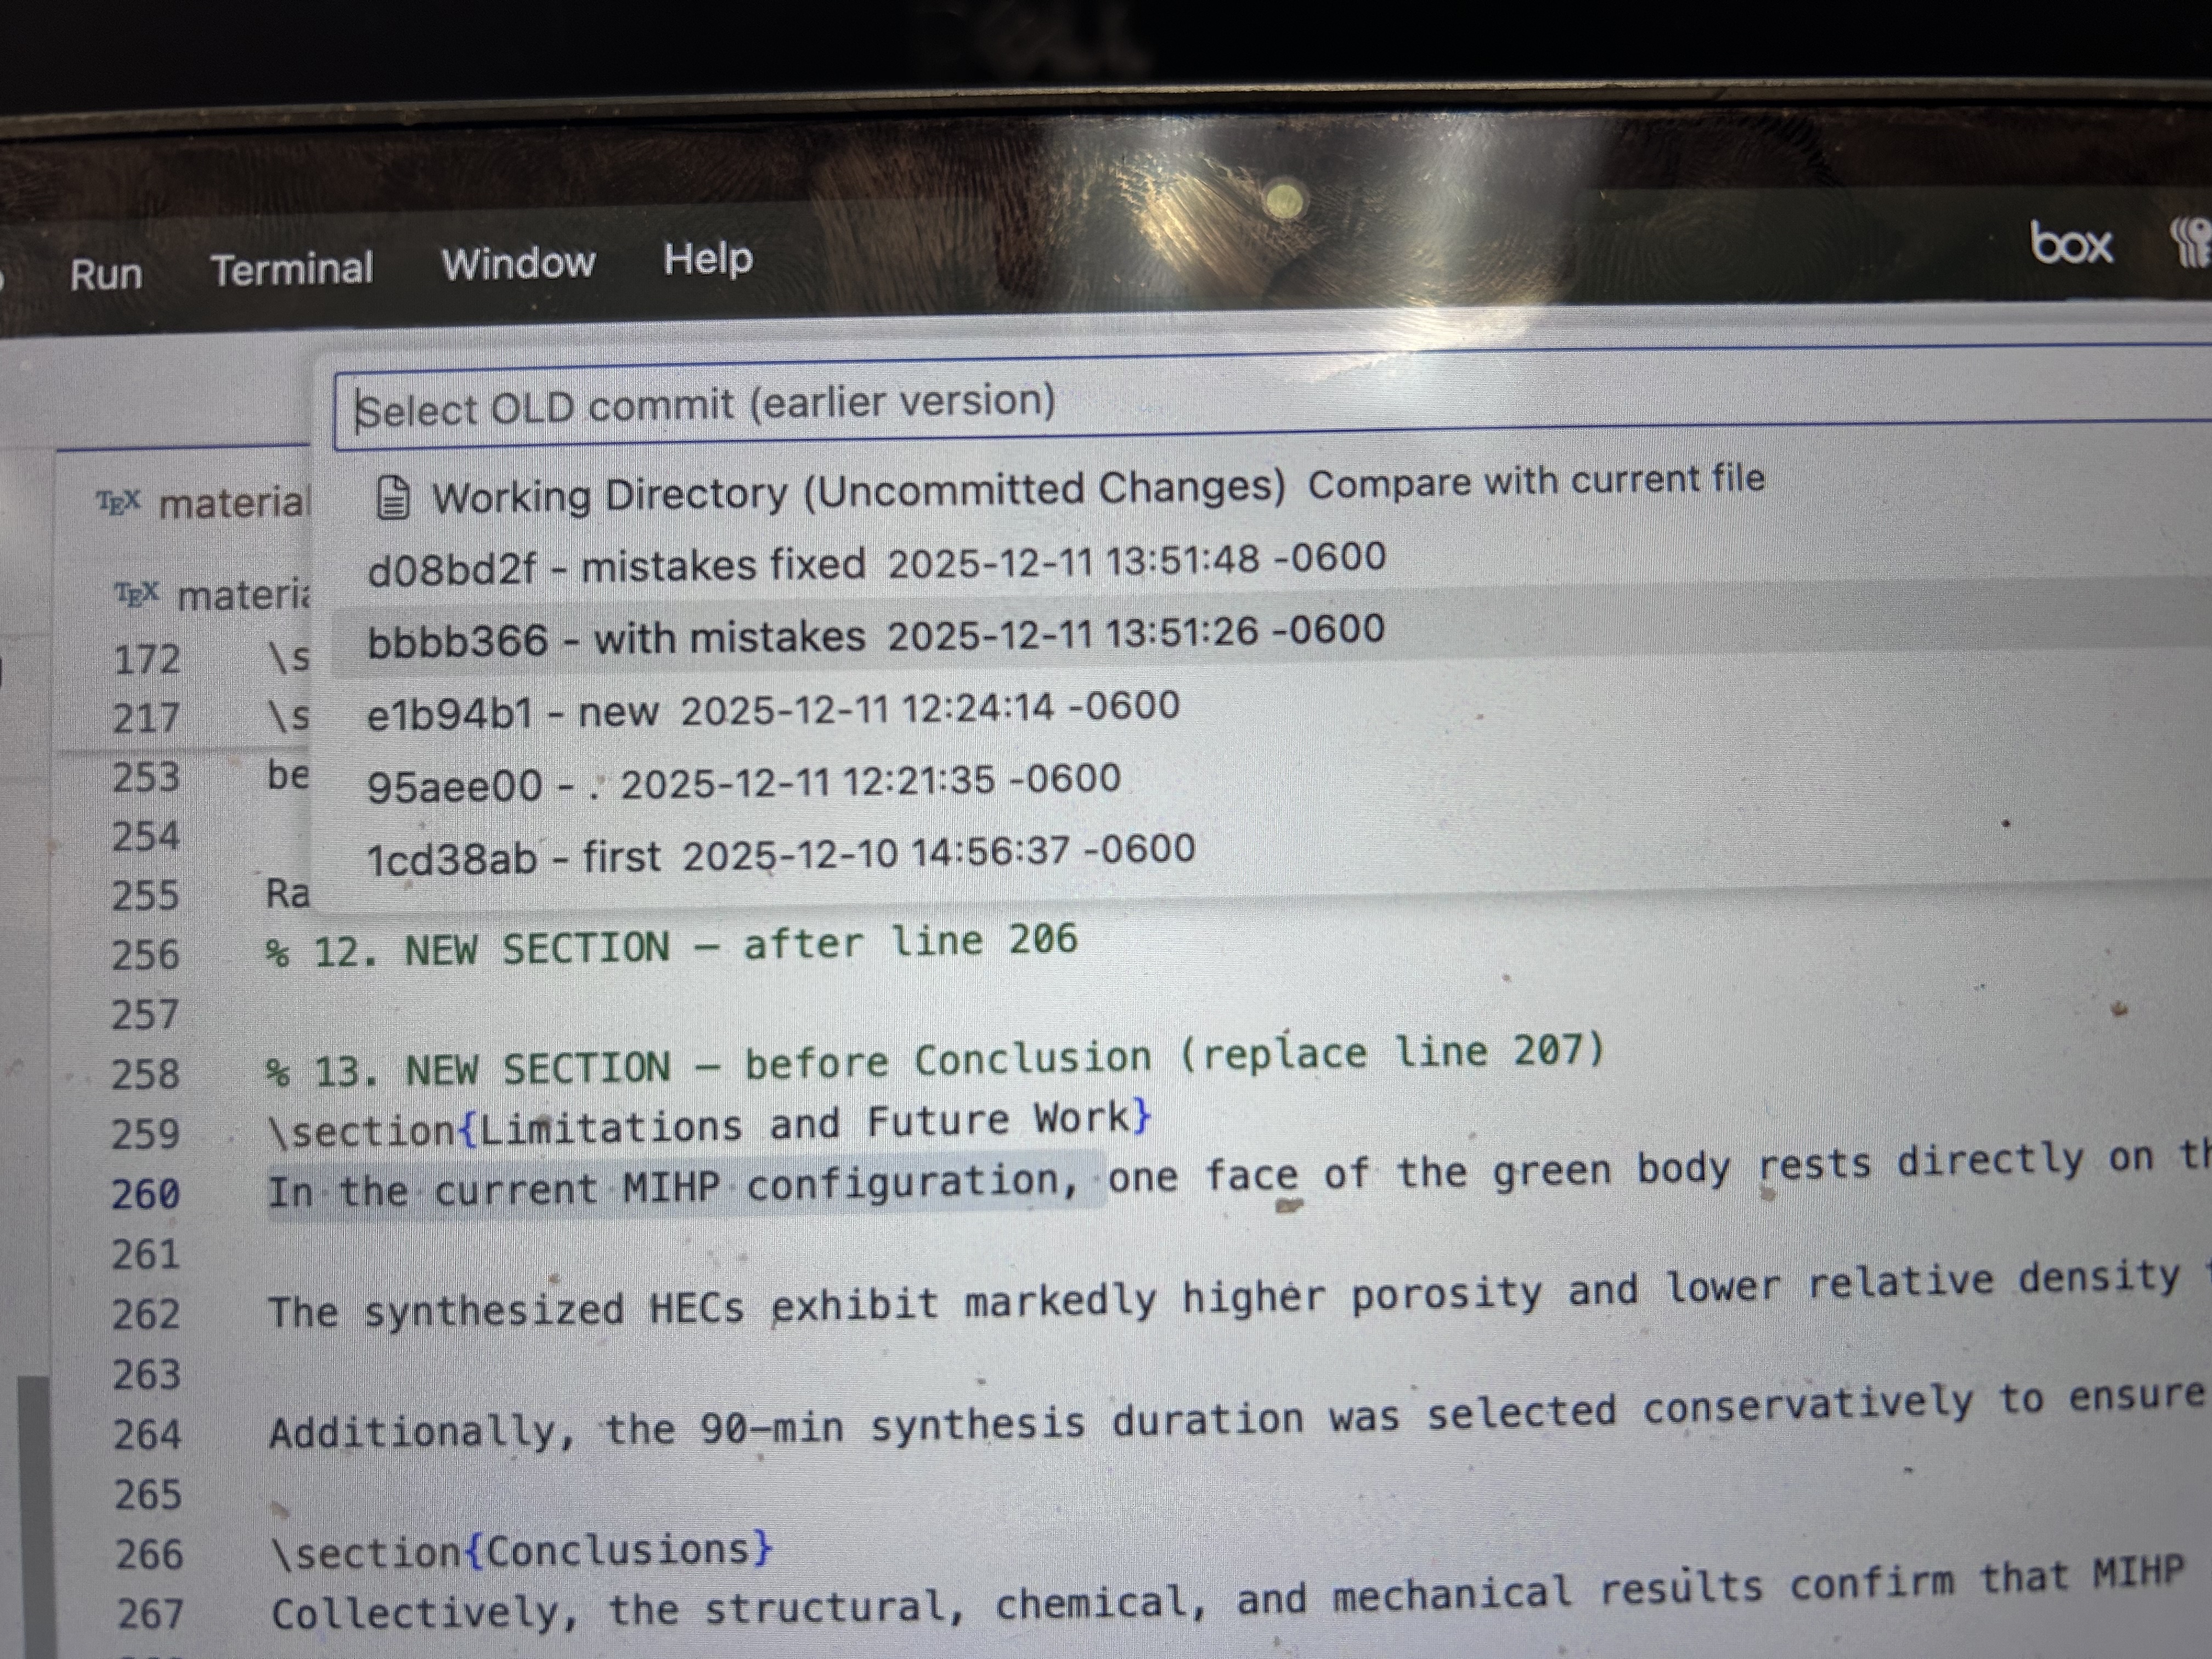
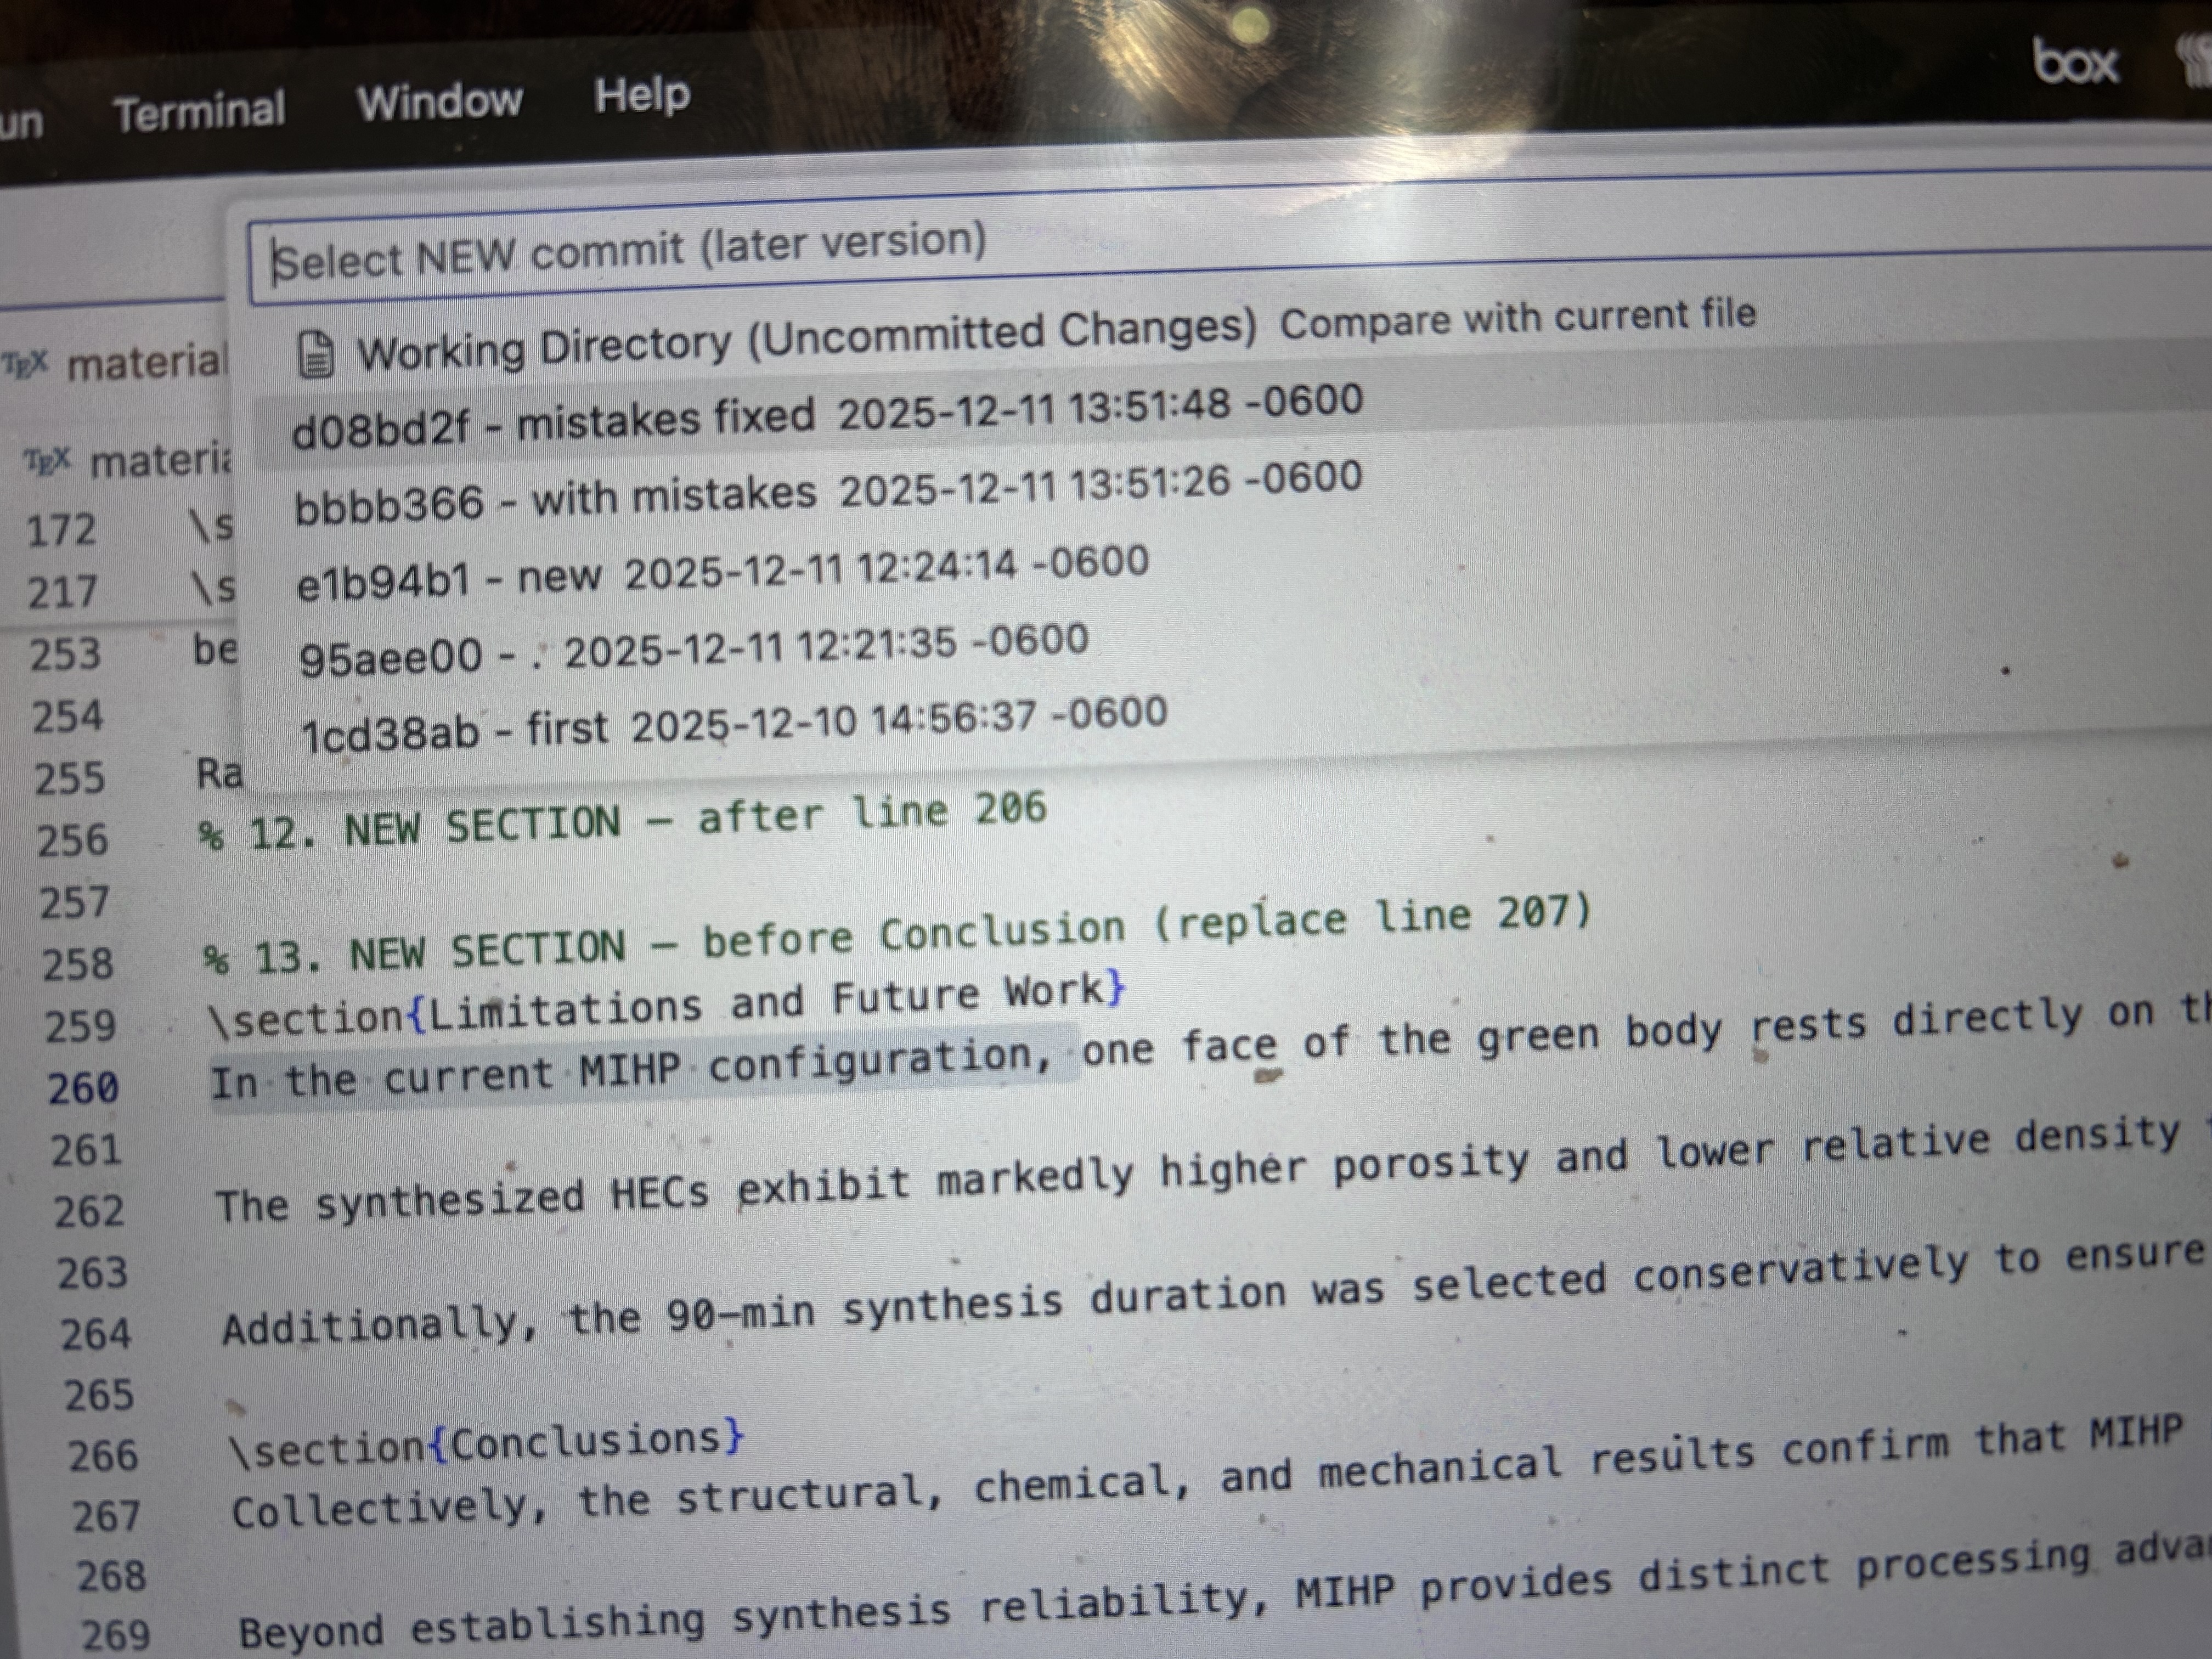 Anchor the older side of the diff by selecting the commit you want to compare against.
 Pick the newer side of the comparison—usually your working directory—to see the latest edits against an earlier commit.
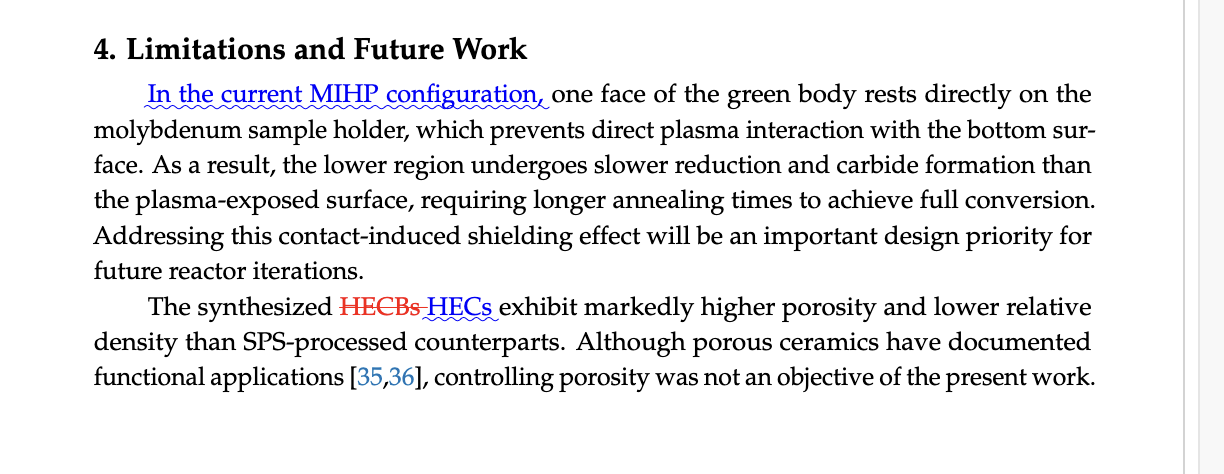 This is the compiled PDF produced from the generated
 latexdiff file, showing additions in blue and deletions in red just as journals require.
Share or submit with tracked changes
- Send to collaborators or advisors: Compile the generated diff file to PDF and share it so reviewers can see all edits in color. The PDF is fully standalone for quick comment rounds.
- Submit to publishers with change markup: When responding to reviewer comments, generate a diff between the last published commit and your revised draft. The resulting PDF clearly marks insertions/deletions, so you can upload it as the “tracked changes” version many journals request.
- Pre-merge validation: Before merging a branch, create a diff versus
mainto verify all manuscript edits are intentional. This also produces a ready-to-circulate tracked-changes PDF for sign-off. - Advisory revisions with context: Pair the diff PDF with your advisor’s comment IDs by generating diffs on specific branches (e.g.,
advisor-notes→revision-v2). Each colored change maps directly to a comment, speeding up approval. - Camera-ready confidence: Before final submission, regenerate the diff against the camera-ready branch to ensure no late-stage formatting tweaks slipped in unnoticed.